A couple of good friends and I have road tripped from NJ down to NC for a end-of-summer vacation.
We first spent some time at Cape Hatteras, before going to our Air BNB vacation home. We didn’t spend too much time at the beach, we’ll be coming back in day two- kits were flown and candid portraits were shot!
Let’s Go Fly a Kite
Beach Portraits
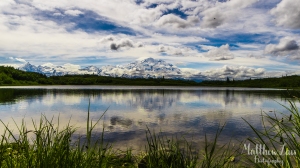
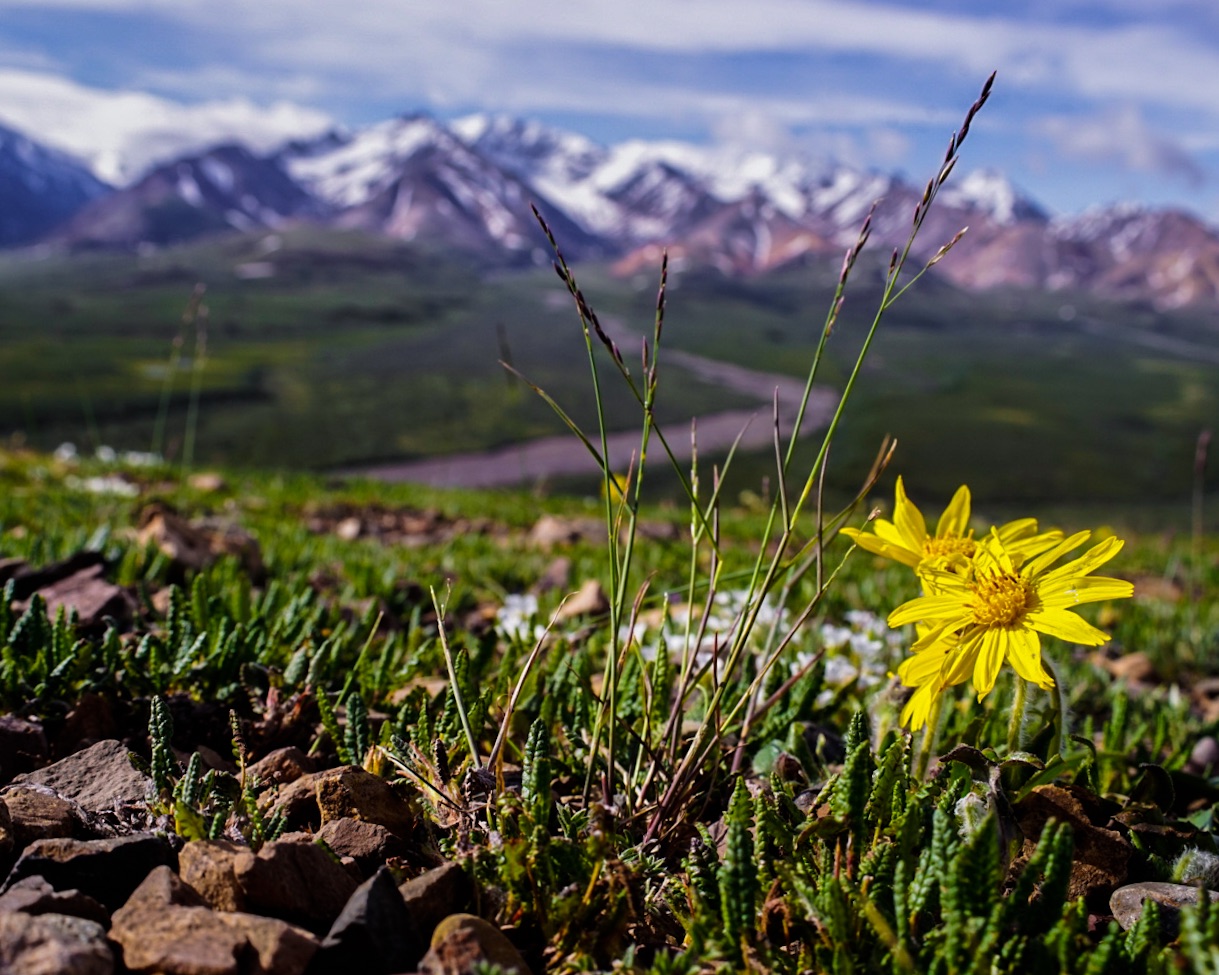
Milky Way and Meteor Puddlegram When we got to our vacation lake home, I was excited for the sun to set, and for the sky to darken. When time finally came to look at the stars, I was in awe. The photo below is a lot brighter than what the eye sees, but I was able to see the accents of the Milky Way through the naked eye here in the Outer Banks. Captured a meter/shooting star as well! 🙂
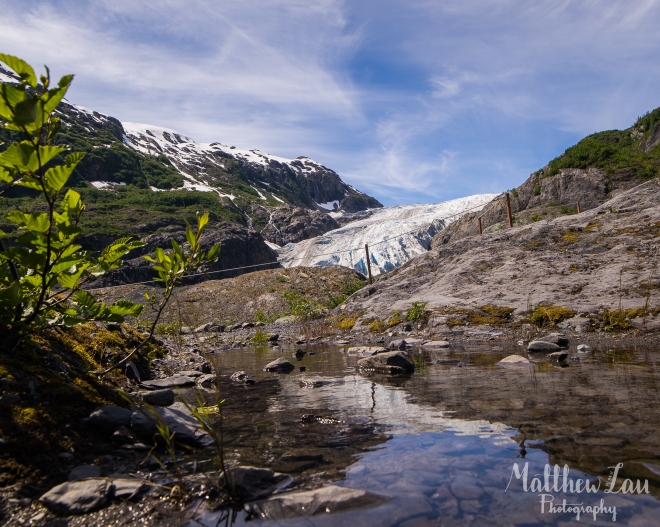
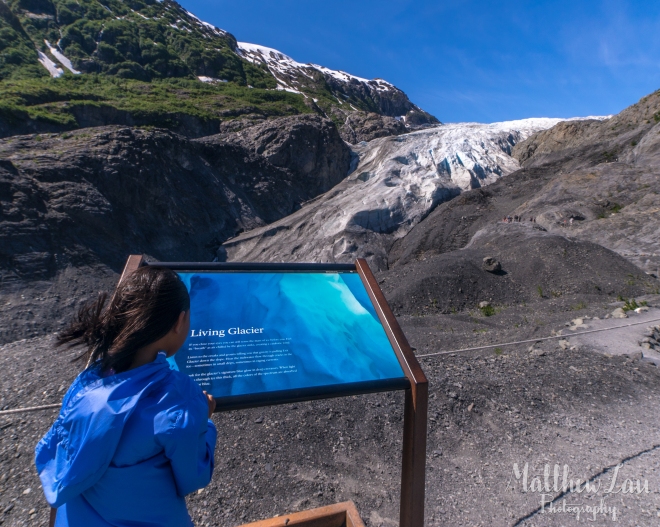
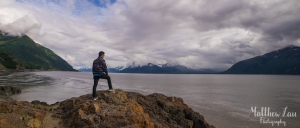
Day 5, our second day in Seward, we went to see glaciers again, the day before on water, but this time on land! We visited Exit Glacier in Kenai Fjords National Park. It’s a shorter and accessible trail, so pretty much anyone could walk the path and see it 🙂
Puddlegram! Exit Glacier reflected in a puddle.My family enjoying the view of the glacier!
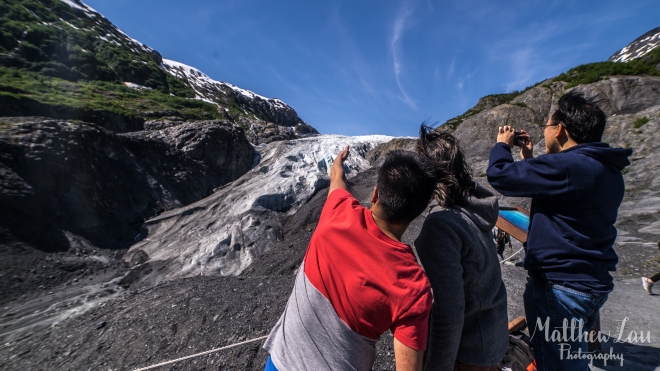
The sad thing is, Exit Glacier is, well, exiting! The picture below is the one of the closest vantage points the park’s trail takes us to view the glacier. In 2010, the glacier was much larger. I would have been able to touch the glacier from where I took this photo only 6 years ago. 100 years ago, the glacier, the mile trail we walked was essentially all glacier.I essence, the glaciers in Alaska have all been slowly shrinking since the end of the earth’s ice age, but in just the last decade, it’s been shrinking faster and faster, and Exit Glacier here is an up close and personal example of one of them.
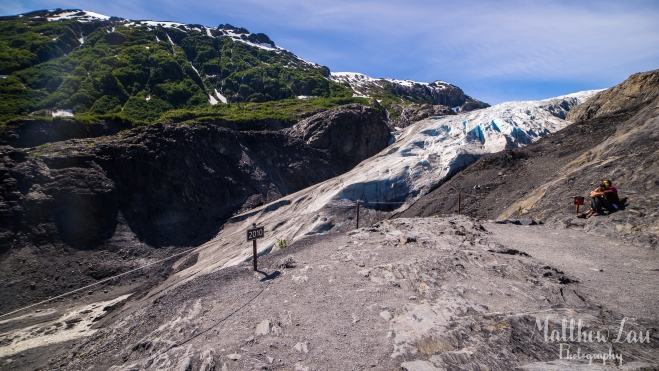
This picture shows how far the glacier had been just back in 2010.
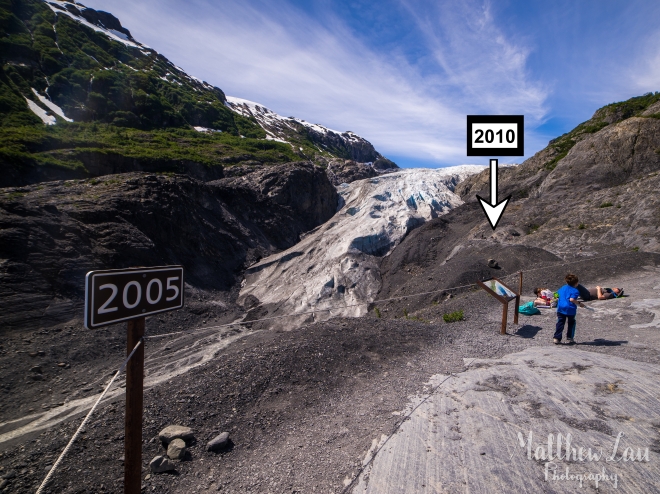
If that picture doesn’t scare you, how about this one? I took it from farther back where the glacier reached back in 2005, just eleven years ago (I was only ten years old, and I just turned 21 recently). I also added an indicator below to show where I was standing for the photo I took above of the 2010 sign.
The glacier’s size back in 205. In 11 years, the glacier has shrunk from 2005 sign to the one you see in the photo now. The “2010” arrow points to were I took the photo above this one- how large the glacier was in 2010.
What were you doing in 2005? 2010? Comment below 🙂
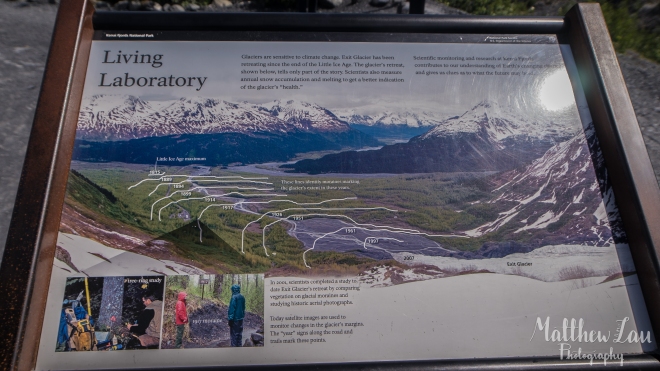
In the infographic below, Kenai Fjords National Park scientists also say that the glacier used to be much larger, and has been shrinking and melting more and more every year.
Information and graphic in this photo belong to Kenai Fjords National Park.A mini-water fall within a crevice of the glacier.
My brother made an extra climb up closer to the glacier, and he got to touch it! Check out his Instagram post below, and follow him @timclau 🙂
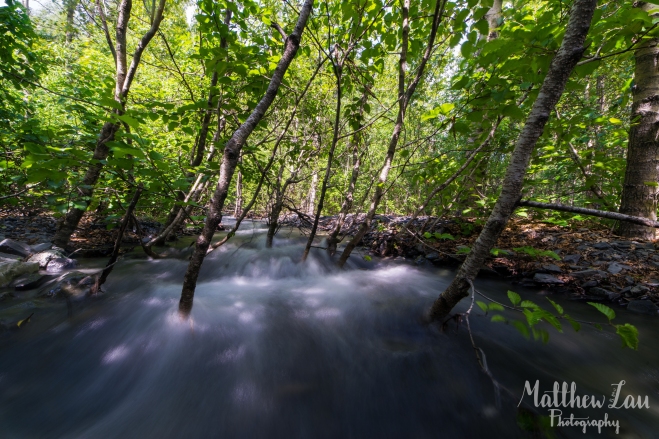
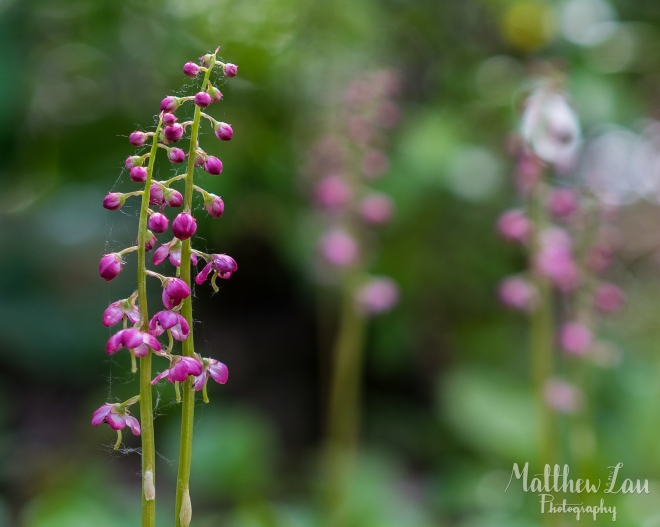
A few non-glacier pictures taken along the trail. Cool to think that all the trees, rivers, flowers, and earth used to be frozen less than a century ago!
(Long Exposure) – river we had to cross to see the glacier.(Macro) small flower that was along the trail to see Exit Glacier
We ended the day by going back to Seward and taking a stroll around Seward. Turns our there is large RV park by the bay, and lots of families either camping out or living in their RVs. It’s a beautiful place to be in the summer.
RVs and/or Campers around a fire.The Seward Beach.
I hope you enjoyed these photos of Exit Glacier and the Seward Bay. However, I want to challenge you to educate yourself on the warming of Alaska. I know there is lots of controversy about the politics of global warming and climate change. However, I’m not asking you to look into politics, but to check out and see if beautiful natural wonders of Alaska-its glaciers for example-may soon cease to exist. Also, with glaciers gone, cute little tourist towns like Seward may lose its large amount of tourism, which is important for the town’s economic well-being (when no tourists come in the coldest months of winter, many Seward residents and workers actually leave for a break because there is no work for them).
The Natural Resources Defense Council, or the NRDC, a non-profit that aims to protect the earth’s natural ecosystem and the animals, plants, and humans within it. They have fought for clean water in Flint, Michigan and have campaigned against the antibiotics found in Kentucky Fried Chicken’s poultry. These are just two of the many projects they’re working on- and they reported the day I arrived back in Jersey that Alaska is having the hottest year ever recorded. Check out their tweet below:
You can take what I say with a grain of salt. I’m not trying to convince you to believe everything I say, but I do hope that you would at least educate yourselves about the climate change in Alaska if you have not already. The unfortunate conclusion is that in just a couple of years, kids will never be able to see glaciers in Alaska anymore.
Soon there might not a be a glacier for us to see anymore 😦
But two truths are clear: 1. Alaska is having the hottest year that’s ever been recorded. 2 This glacier, Exit Glacier, has been shrinking faster and faster by the decade, and so are the other glaciers in Alaska.
For me, that’s enough reason to start demanding climate action when I can, and having a different perspective on how I treat my earth’s ecosystem- even back home in the suburbs of New Jersey.
What do you think of this “warming of Alaska”? I’d like to hear your opinion if you would like to share; comment below!
Thanks for reading! Be sure to check my past photo blog posts about Alaska by clicking on the images below 🙂
Day 0: 30 Hour TripDay 1: Denali National ParkDay 2: Rain in TalkeetnaDay 3: Talkeetna to Seward, and Views Along the WayDay 4: Cruise Through the Gulf of Alaska
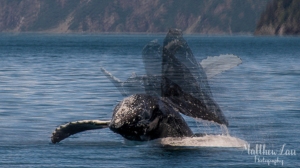
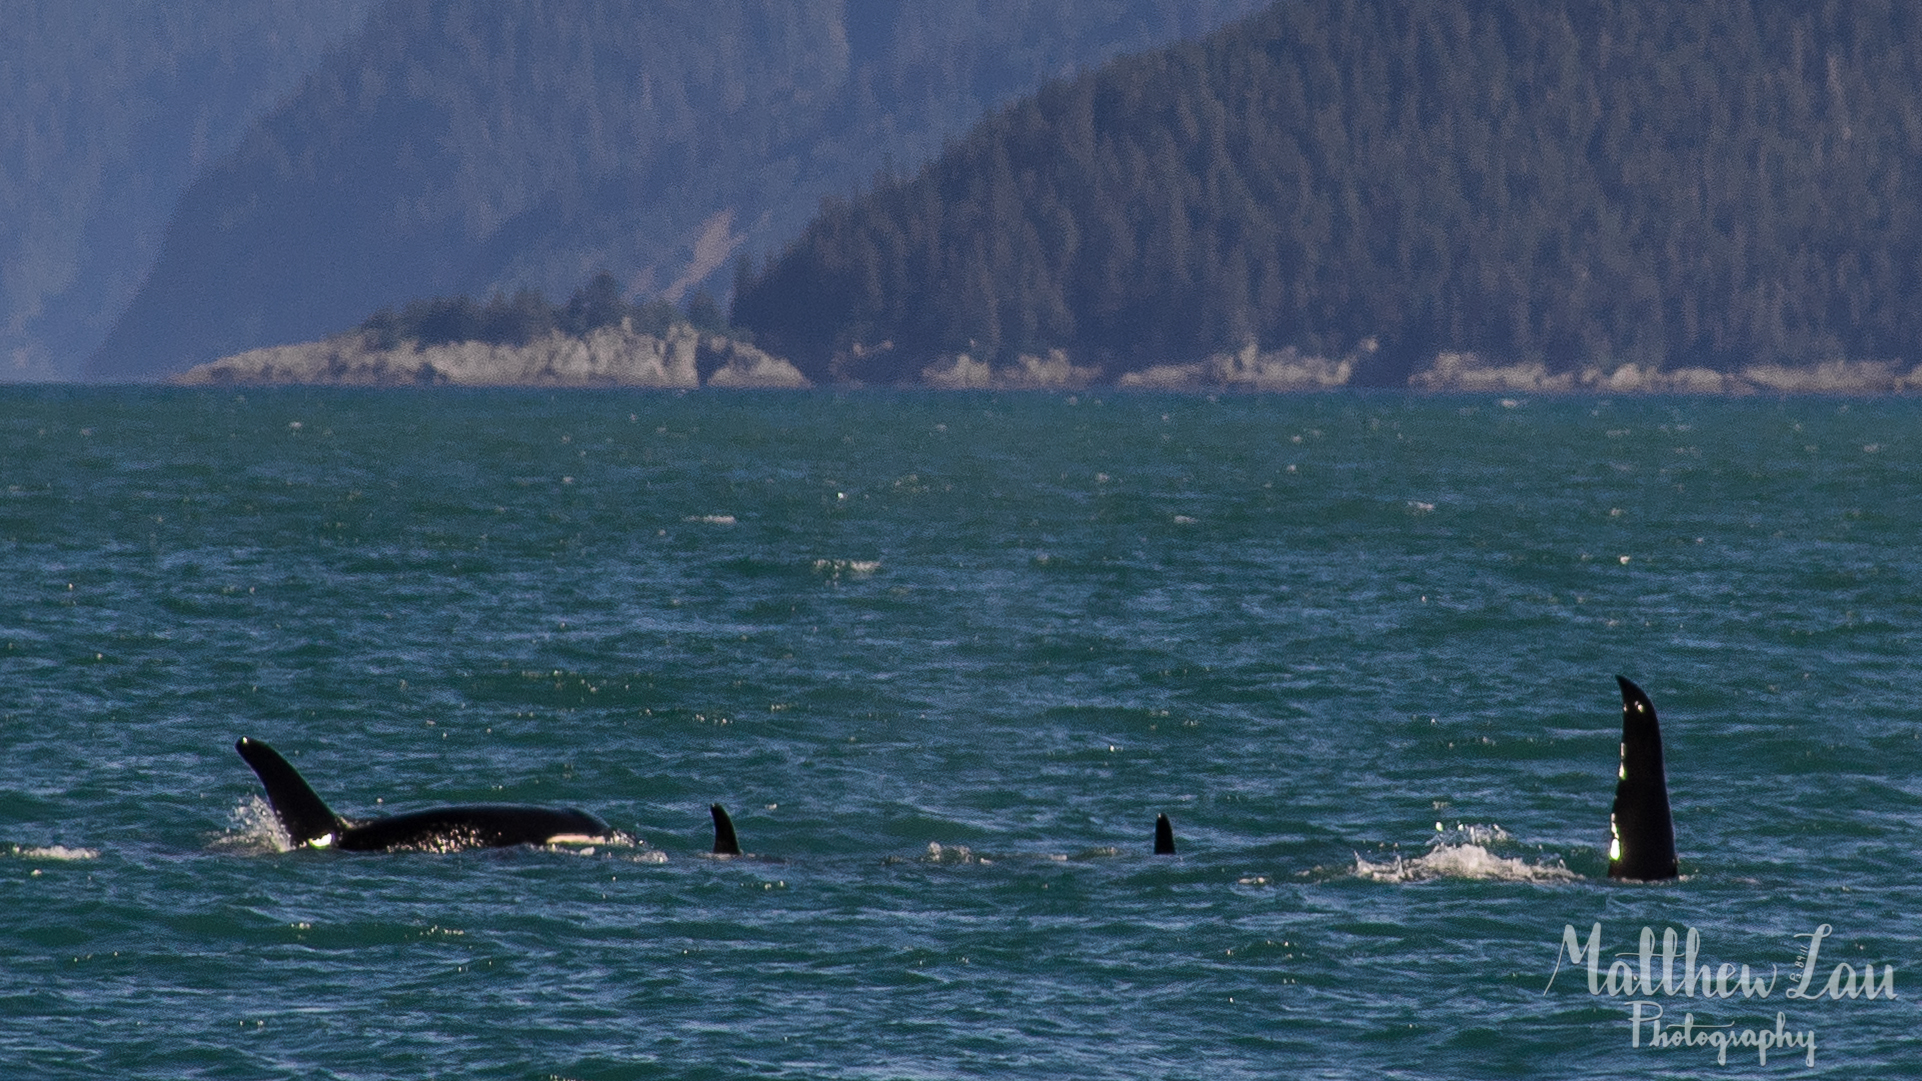
Our first day in Seward, we embarked on a day cruise ship named the “Orca Voyager” with the wonderful Kenai Fjords Tours and sailed in to the Gulf of Alaska to see glaciers and wildlife. We saw orcas, sea lions, otters, puffins and other birds, and the humpback whale).
The Seward harbor and our cruise ship, the Orca Voyager.
Just to give an idea where Seward is in Alaska.Our ship, the Orca Voyager
Otter – before docking the ship in the morning, we found an otter chewing away on a fish right next to the harbor boardwalk. Pretty adorable 🙂
Orcas (Killer Whales) – I wasn’t able to get many good photos of the orcas, but they’re one of my favorite animals! This photo came out alright.
Humpback Whale – another aspect of our trip (like the weather during our Denali tour and the weather during the cruise), we found a humpback whale (probably a young one according to the ship captain) that jumped almost 30-40 times, and waved to us, sort of showing off. But it was a beautiful sight. My dream is to see more dolphins ❤ in my home state, in Atlantic City.
Humpback whale posing with a glacier. Probably my favorite photo of the day, perhaps the week!
Stitched a couple of continuous shutter photos together!
The was real close to the ship for this picture. I wish i didn’t cut off a little of the nose though, haha!
Alakik Glacier – this glacier could be gone in a couple years!
Alakik Glacier
Birds – there were lots of seagulls, puffins, and other birds, but most of them were very small to see. Puffins especially. Without binoculars or anything, it was hard to see the cute faces of the puffins. But there were so many. The captain liked to point out large puffins to us; she said that there are puffins who have eaten so much that they can’t fly, and when they try they end up failing. That’s sort of adorable :). At the Wildlife Center in Seward that my brother and I visited on Day 6, so look out for some adorable puffin pictures on my post for that day!
Soooo many birds.
Sea Lions – these water had a couple sea lions that are called “Stellar Sea Lions.” They are branded with a letter/number combination, for studies. I found a link online to a spreadsheet that tracks where they’ve been seen.
Sea Lion posing with seagulls.
Sea Lions napping. The darker sea lion climbing up is a “Stellar Sea Lion.” He is branded with letters to track him for studies inside these waters.
First thought this could be mother and child. However, my dad said he read that female sea lions are much smaller than male sea lions. So this could be a romantic photo ❤
We stopped by Fox Island, where they had a cafeteria that served us salmon, prime rib, and if you wanted, king crab for an extra fee, as part of the overall tour package. Then we returned home, finally, after an 8 hour trip.
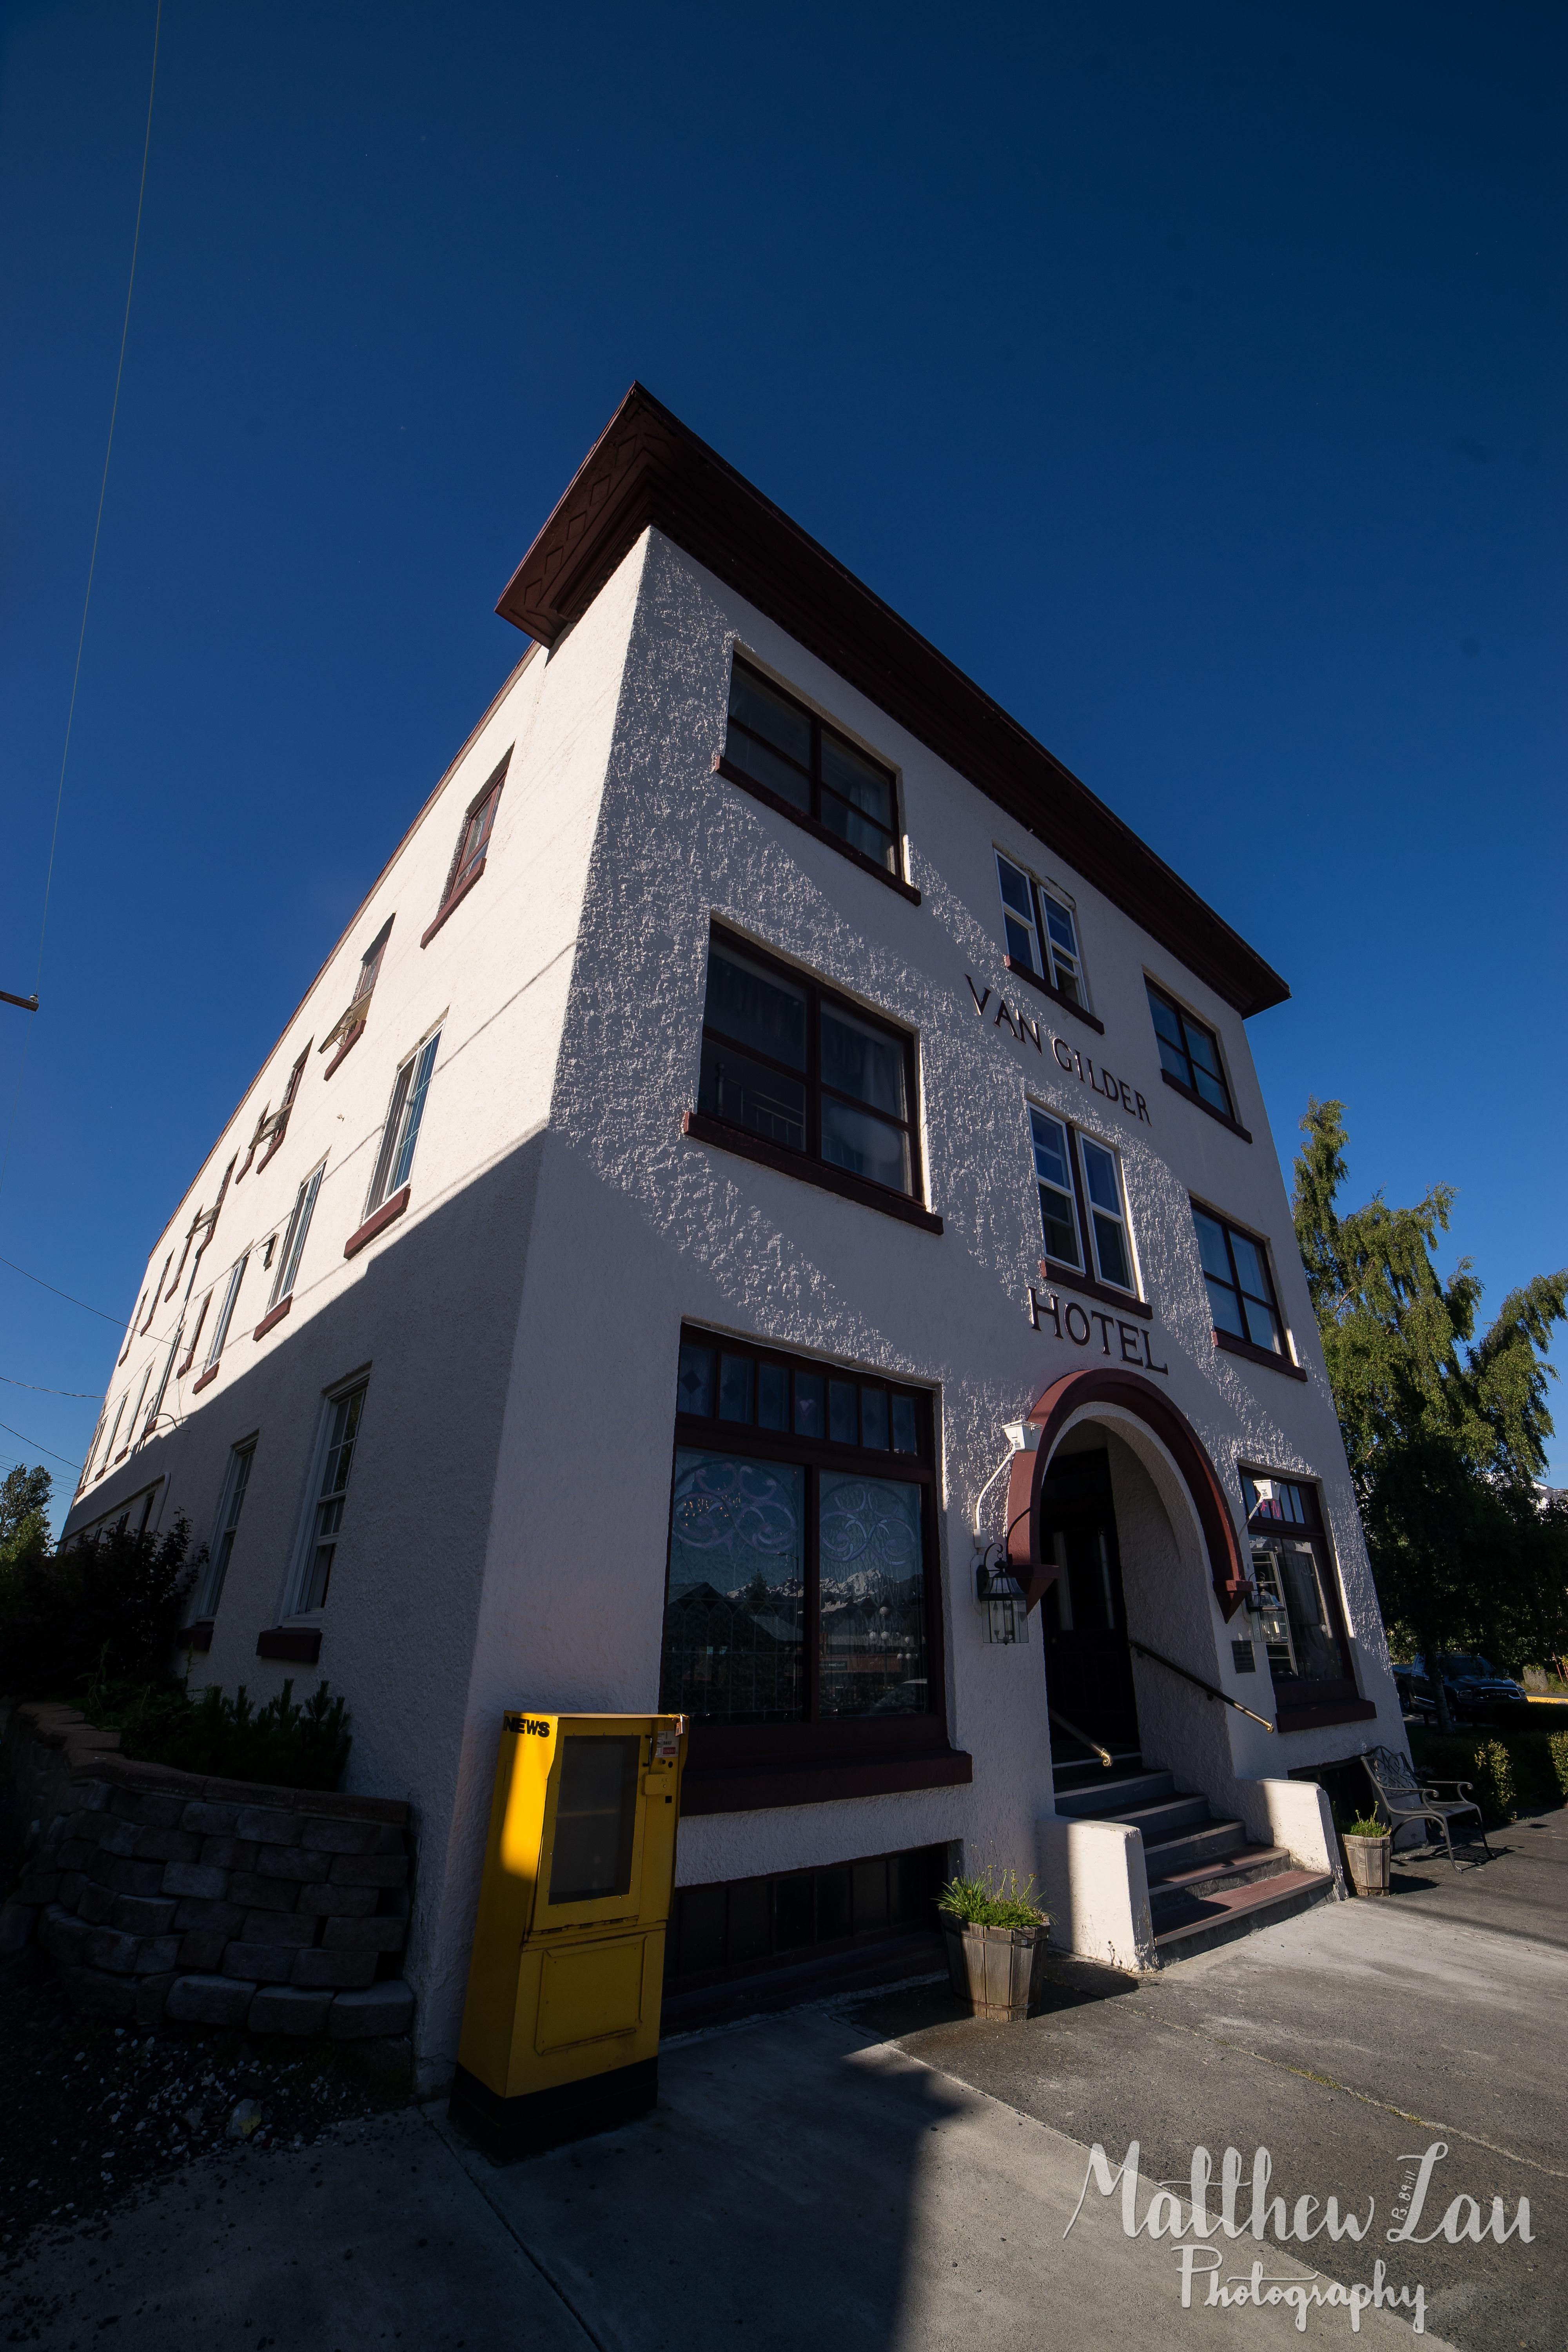
Extra Tidbit: The Van Gilder Hotel (Alaska’s Oldest Hotel)– for two of our three nights at Seward, we staid at the historical place called The Van Gilder Hotel. It’s very historic and has been placed by the U.S. Department of the Interior as a part of the National Register of Historical Places. Essentially the hotel has kept his architecture very much the same and using their old fashion beds and antique furniture. There are obviously renovations , such as added TVs and bathrooms. There were still bathrooms and even a shower room in the hall of the floor I stayed on.
After we left, my brother said that there is a myth about a ghost inside the Hotel, called “The Ghost of Fanny Guthry-Baehm” (there’s even a book about it). I’m glad he told me after we left, or I may have been freaked out. The synopsis of the book linked above says “Fannie Guthrie-Baehm was murdered in room 201 in 1947, and her ghost has been witnessed by many over the years.” Oh my. Chills. Would I recommend the hotel? I’m not sure. I liked the historical vibe, but it wasn’t as comfortable as a normal hotel. Also, now that I’ve read up on the myth, it’s spooky. But the owner was nice and helpful!
The TV was put really high up (top left corner, mostly cut off in photo). Antique lamp and phone on the right side of the photo.
Day 5 coming up soon :). Thanks for reading!
Read about my previous days clicking on the labeled photos below:
Day 0: 30 Hour TripDay 1: Denali National ParkDay 2: Rain in TalkeetnaDay 3: Talkeetna to Seward, and Views
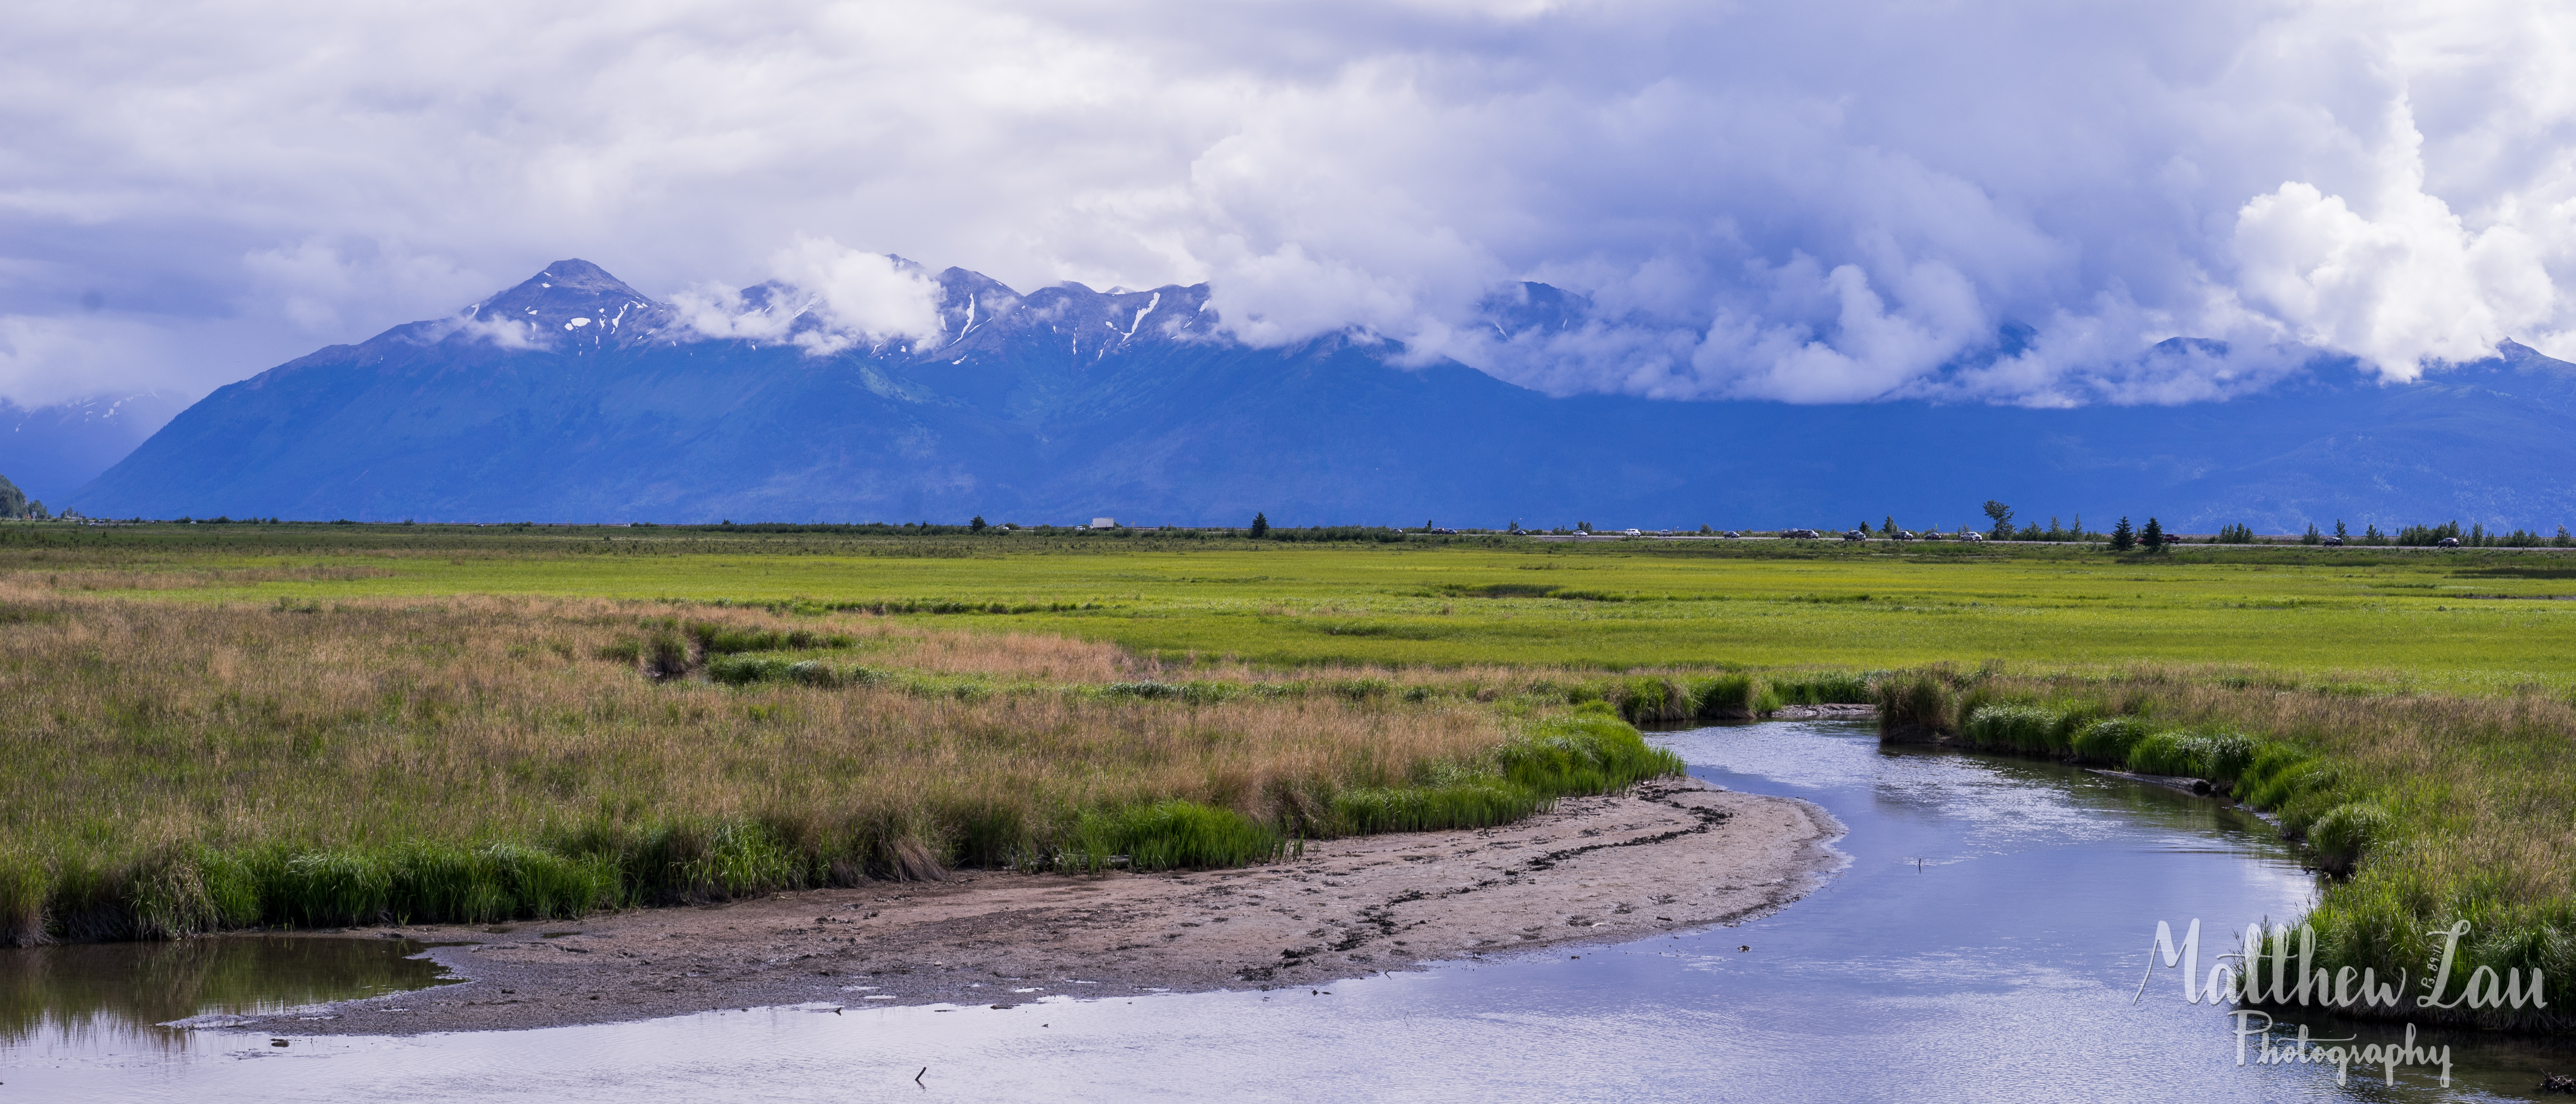
Alaska Day 3: our day will finish down south in Seward. It’s 200+ miles south of Talkeetna, with Anchorage (where the airport is) in between. You should know that Alaska has two legs right? Well, there’s a little peninsula between the two legs- that’s where Seward is- on the south coast.
We stopped by three places before reaching Seward:
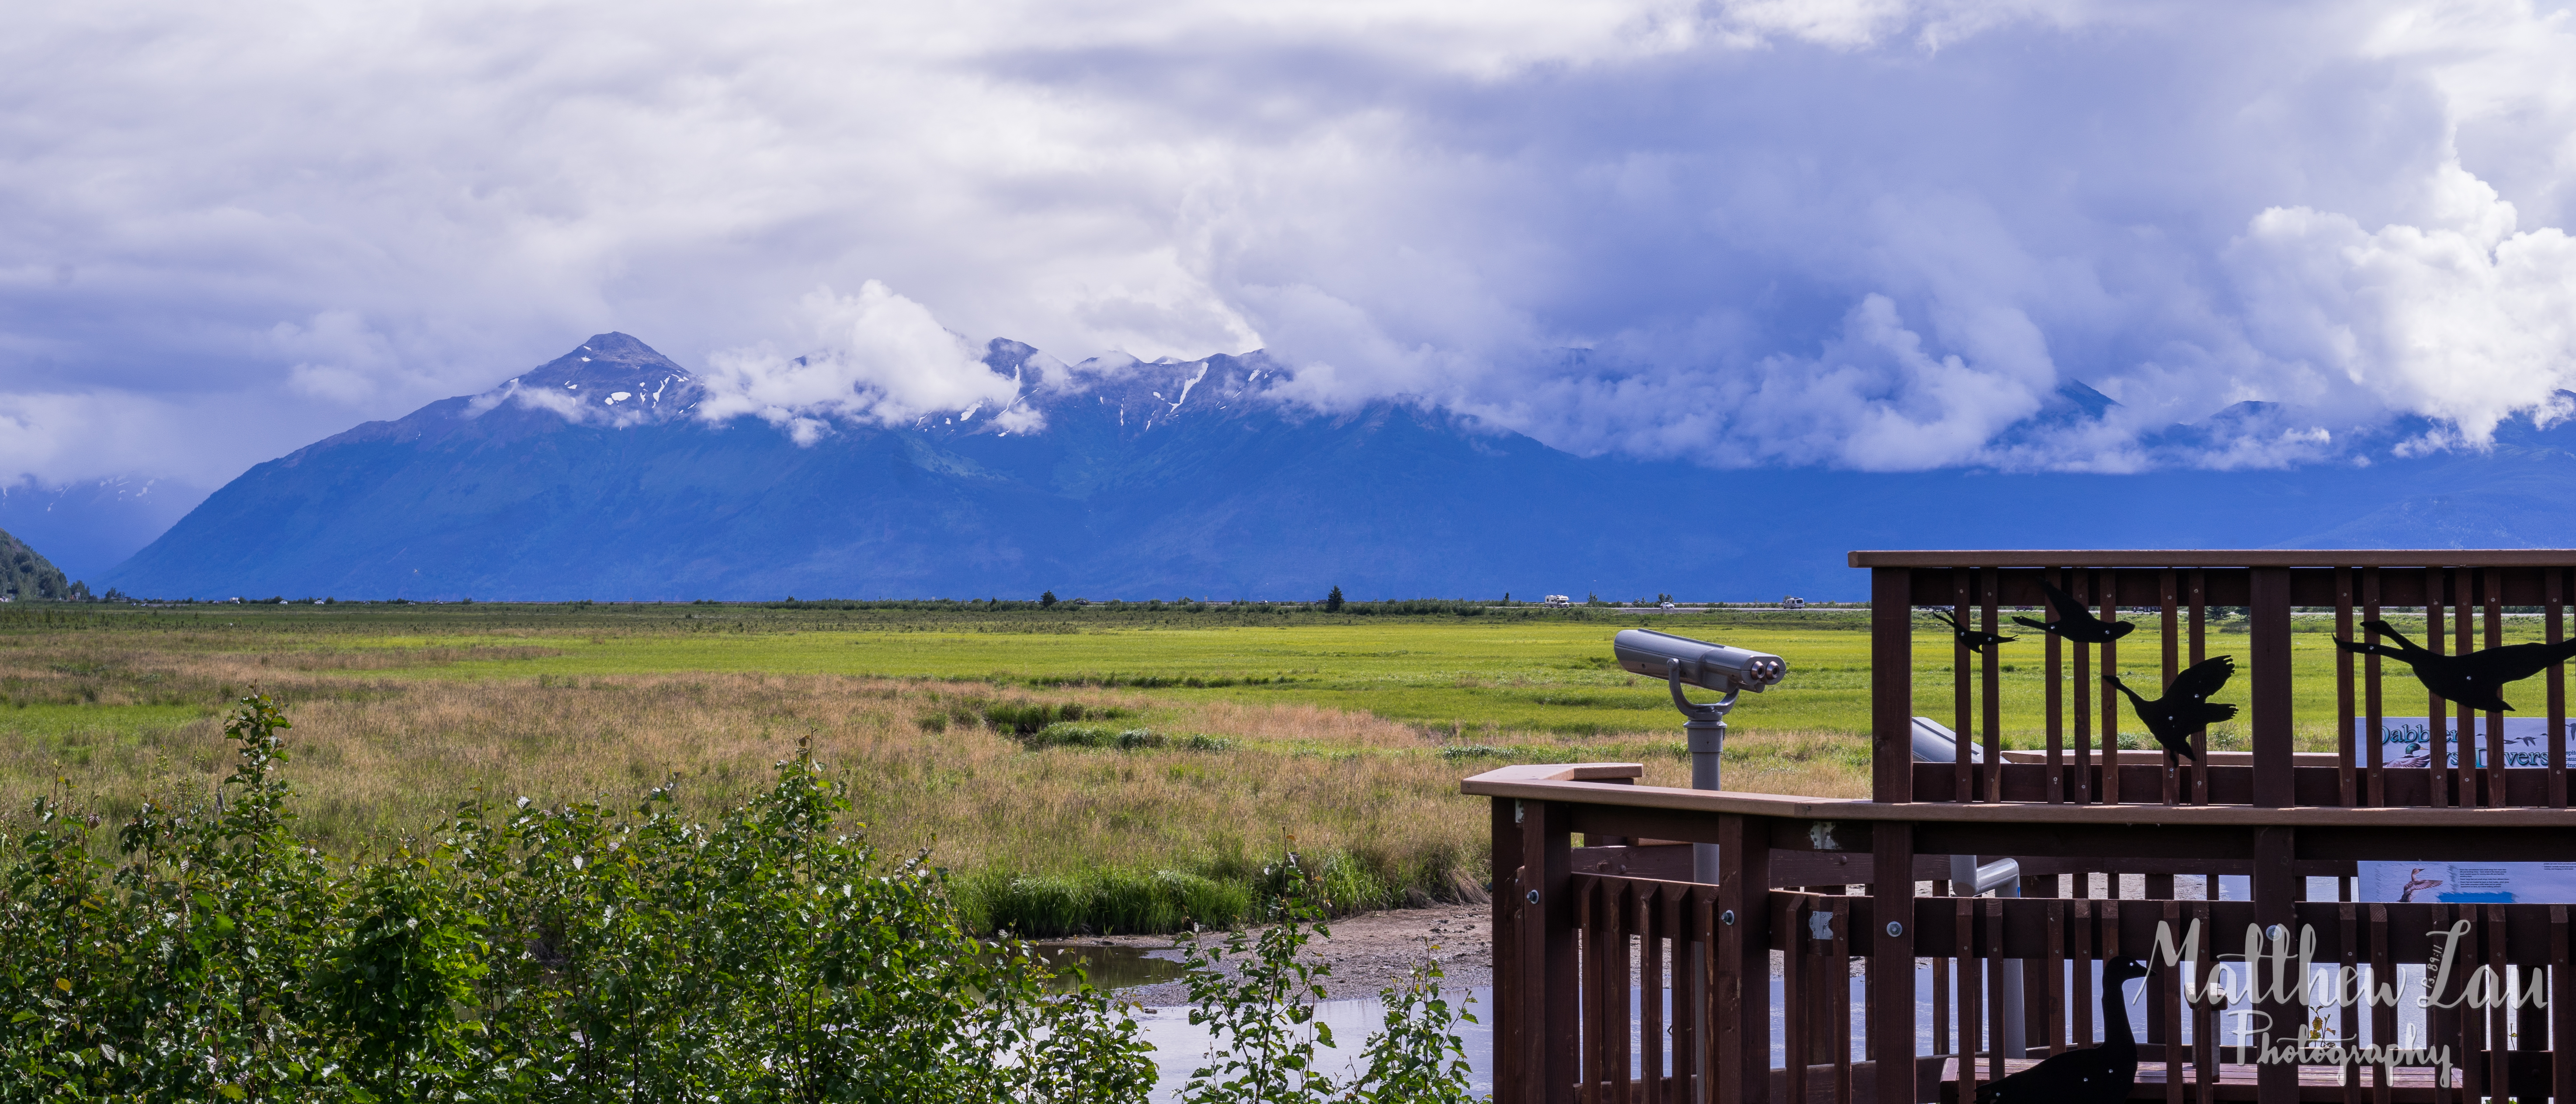
1. Potter Marsh Wildlife Viewing Boardwalk – a boardwalk where there is a lot of grassland water. The water apparently was created by man, by accident. We saw a moose, eagle, and lots of other birds at the Marsh.
2. Beluga Point – a lookout point by the water viewing the Ocean between the peninsula and the West Alaska. There are apparenty Beluga whales that come by the coast, but we didn’t see any.
3. Alaska Wildlife Conservation Center – this isn’t exactly a zoo. This conservation center’s animals (beats, bison, deer, elk, etc.) are mostly hurt and/or orphaned, and the center takes very good care of them. Just last year, they released a large group of wood bison back into the wild. There are three bears- two were orphaned cubs when their mother was shot. Another was found injured by a porcupine by some people snowmobiling in Alaska. I’m really glad that this conservation center is seeking to help animals, not just show them off for attention or money. 🙂
1. Potter Marsh Wildlife Viewing Boardwalk
Views of the water and grasslands at the Potter Marsh:
Some wildlife:
The moose we saw, wth the potter marsh in the background.
The moose we saw, wth the potter marsh in the background.
2. Beluga Point
View of southwest Alaska at Beluga Point.
3. Alaska Wildlife Conservation Center
Deer 🙂Aw, bear, I’m tired too.This bison on the right is peeing!Mom & Dad ❤
After the Conservation Center, we drove another 2 hour or so and made it to small town Seward. It was around 9 PM Alaska time, and most restaurants were closed, but we were able to find dinner 🙂 We would be staying in Seward for 3 nights. Stay tuned!
Thanks for reading! Check out some of my past posts by clicking on the images below, and keep a lookout for Day 4!
Day 1 after 30 hours of travel and a good early night’s rest (also adjusting to the 24 daylight called “Midnight’s Sun” here in Alaska), we were up early and were off by 7:15 AM to Denali National Park, home to Denali (formerly known as Mount McKinley), the highest peak in the US.
The only way to get into the park past a certain point is to use the park’s bus tours (the main road extends to 84-89 miles long, but private cars are only allowed to drive past mile 15 now). The bus we signed up for went from the parking lot to the 84th mile – Wonder Lake. The bus made about 8 stops give or take, and the bus also often stopped if there was any wildlife near the roads. The buses would be rotating very often, so if we wanted to stay at any certain spot and enjoy the view longer, hike a trail or two, or even camp, we could, and other buses could take us a long later. However we stuck with the same bus all day, and the trip went on from 7:30 AM till around 6:30 PM (almost 11 hours!). 168 miles on not the best terrain, with stops along the way.
Bus tours are the best way for us to see Denali National Park. (Sony !7)
Everywhere we went, there was just so much distance to see for miles and miles, and beautiful mountains surrounding us.
Denali (Mount McKinley) and the reflection pool.
We saw a good amount of wildlife.
A moose about 100-200 yards from our bus.Bear and CubsBear and CubsMale MooseElkSheepSheep
Our bus ride might have been great, and the car ride could be boring, but our driver might have been the highlight of the trip. A school bus driver during the year, she gets to work in Denali National Park, interacting with people, telling stories, or make lots of jokes. Thanks, Wendy, for being a compassionate and loving driver and tour gjide.
Our cheerful and incredibly bus driver and tour guide, Wendy.Family Photo with Denali. #30percentclubMy favorite picture of the day for sure!
On our bus, we met an older couple who owned an RV and have been driving for a long time. The lady told us we must get food at the “Salmon Bake” and that it’s worth it. It was! Salmon and Halibut are Alaska’s favorites. Also, Happy BIrthday Mom!
I’m really loving going back and re-editing photos and seeing how much I have learned regarding both taking photos and also editing them.
August 8, 2015: Rutgers Community Christian Church, Somerset NJ.
Jasmine studied abroad for the Fall semester, so this was the last time I got to really see her before she left! We both had a free afternoon on this Saturday at church after praise practice on the same team. We took a Sunday school classroom and I set up some simple lighting with two soft boxes. Jasmine brought 4 different outfits to wear, so I’m going to split up photos from this day into two days.
This is my first time trying to use studio lighting for portraiture, and it was not easy. Here are five photos that came out nicely 🙂
Tried a different type of lighting here:
—
Lesson #1: Be prepared. Know how you’re going to set up your lighting. I didn’t really know what was doing… so it was not easy to get started. However, it was a good first learning try.
Lesson #2: Make sure, make sure, the subject is in focus. It may look nice from far away, but the photo may still be blurry or out of focus. Using two slow of a shutter speed will cause blur and unsharpness too. A lot of my photos were off because I didn’t make sure they were coming out sharp and in-focus.
This photo had a cool candid expression from Jasmine, but was out of focus 😦
Lesson #3: Back up your SD card photos as soon as possible. Don’t put it off! I only imported a couple of photos what were RAW format (more data to edit on Adobe Lightroom). Then I lost my SD card. Most of the photos I ended up having are the .JPGs, which aren’t as nice to edit as RAWs are (RAWS are around 18-24 megabytes, when .JPGs are around 1-9 megabytes). Losing nice pictures are the worst! I took parent/student photos about a year and a half ago for a youth group graduation for 8th graders headed to high school, and then I broke the SD card before backing up the photos. I never got to send those kids and their families their pictures, because the pictures were essentially gone forever!
Lesson #4: When using a muslin or cloth backdrop, IRON THE BACKDROP, or else it’s all wrinkly and bleh. I didn’t iron the backdrop and used wrinkly backdrop. It is hard to edit the photo in a way where the backdrop wrinkles were not so obvious.
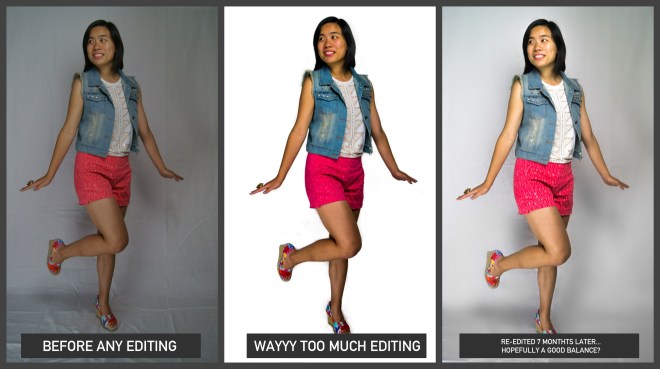
Lesson #5: You can only edit so much. The goal of editing is to make the photo look even better. However, like all things, there can be TOO much editing.
Here is an example of the original photo, the edits I made last August, and the edits I made today. Big difference. You can see the wrinkles in the first photo, before editing. In the second one make the whole background behind Jasmine bright white, which looks simple overdone (tried too hard). The final one, used blurs and such to take away the wrinkle, but keep a sense of real shadows in the background.
However, it’s not perfect. You can still tell that there are wrinkles in the background, especially near the subject… so note to self: IRON THE BACKDROP! It’ll make life so much easier
To be continued… check out the rest of the series below!
Part II: June 26, 2015, Rutgers University – Livingston Campus, Piscataway NJ.
Livingston Campus is the favorite campus of both Jasmine and myself. In fact, even though we attended the same church and youth group growing up, we actually really became friends during freshman year, living on the same dorm floor… on Livi!
I don’t remember how planned out this was. Regarding the pictures, I learned my lesson regarding sunlight and the face shadows it creates at most angles. The first photo I took was taken in an area where it was completely shadowed from direct sunlight (by the student center building) so the light is even across the photo. I angled the rest of the photos with the sunlight directly behind Jasmine for an interesting effect. The face shadows didn’t appear with this angle either!
However, re-editing the photos, however, I realized that with a lot of harsh, bright sunlight behind a subject, there is a lot of chromatic aberration and purple fringing, where there is unwanted purple colors between the subject and the background. My original edits 8 months ago didn’t account for the fringing. I used to say “the sun is my best friend,” but still gotta be careful!
The most difficult part is that the purple fringing is similar to the pinkish/purple color of what Jasmine was wearing. There is a fringing removal tool in Adobe Lightroom, but when I used it to get rid of the fringing on the borders, it would remove colors from her shirt as well. I had to use more effort to remove as much fringing as I could without ruining the color of the rest of the photo.
Yesterday, I started the Jasmine Series. Check out Part I (click on the image below)!
It’s been almost a year since I’ve pursued learning the art of photography and all the knowledge, skills and techniques behind it.
I really enjoy astrophotography (pictures of the night sky) the most, but I also love learning about other photography styles, like macro photography and sports photography.
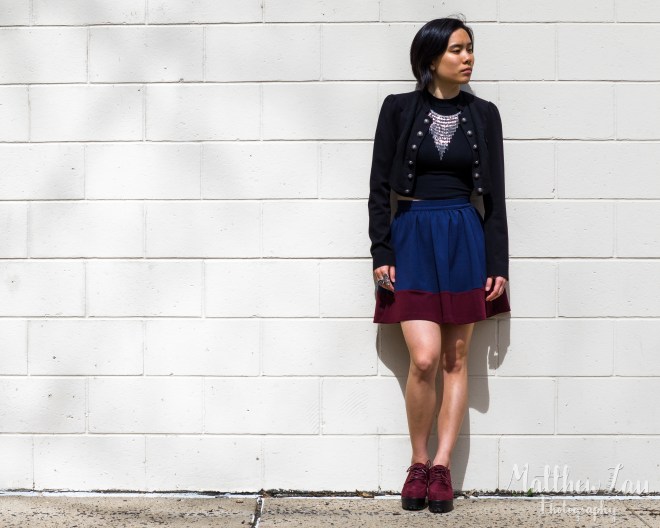
One very important style is portraiture (photos of people) and fashion photography. This is different than candids or photos of events where the subjects of the photo don’t really know they’re being photographed. Instead, the photos have been planned, and subject knows they’re being photographed.
This style is important. But it’s been hard for me to learn. When taking photos of a model, I don’t really know how to direct them. And to have confidence in that takes experience, and to gain experience takes practice and the awkwardness that comes with it.
That’s where Jasmine comes in. She’s been a very close friend of mine since my freshman year, and she loves fashion. So I asked her to help me gain more experience taking portraits.
Let’s be straight here. It’s totally awkward taking a friend out and taking pictures of them. We’re friends, so it’s not like a professional photographer and a model, it’s a friend who likes taking pictures and a friend who dresses well. Big difference. But she was cool enough with the learning curve, and didn’t mind the awkward posing (or not posing) and me standing around with a camera trying to figure out what the heck to do.
Jasmine and I have worked together on four different occasions (that I can remember). Jasmine’s 21st birthday is this week, so I decided to make five posts in five weekdays as a project for myself to get me blogging again and also a thank you to her. The first four days will feature one occasion each. The last one is TBD 🙂
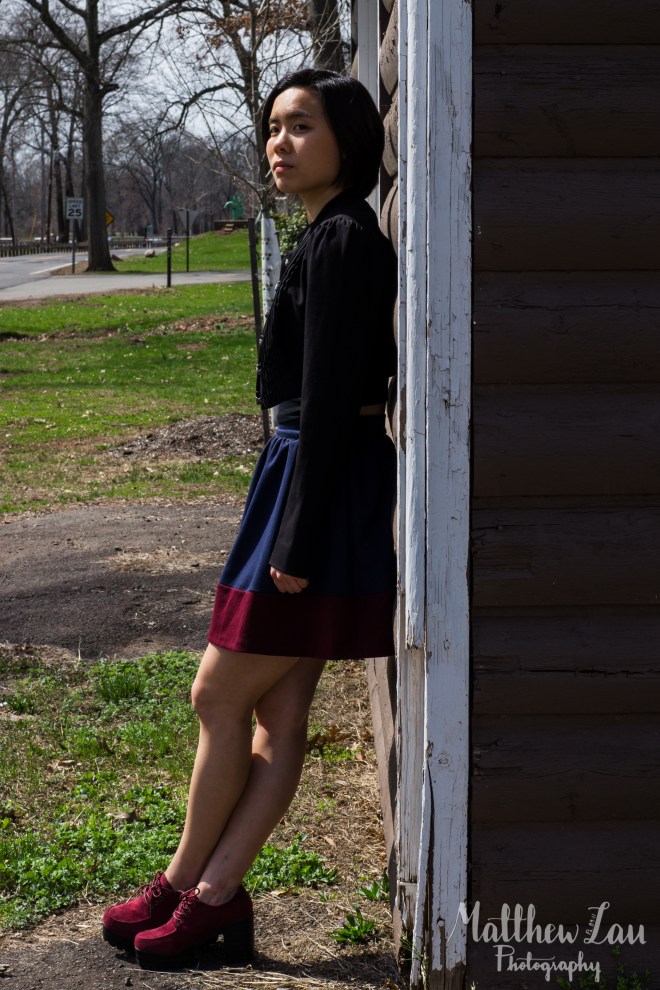
The first occasion was last Spring on April 16th, 2015, at Johnson Park.
Re-editing these photos ten months later, it’s nice seeing what I did/didn’t do well back then. Some photos (like the first one below) came out almost perfectly, and I’m very proud of it. However, there are some obvious flaws even among my favorite shots of that day. The biggest flaw is lighting (like in the second photo below). With the sun as the only source of light outside, the sharpness and quality of the picture will be pretty easy to obtain (fast shutter speeds, higher f-stop numbers and lower ISOs), but where the sunlight comes from is a big deal. With one source of light, there are shadows, even in a person’s face due to the human facial structure or random objects. This can create a portrait where the face has very obvious shadows and dark spots, which is not good even though the photo is nicely composed otherwise (like the second photo below). It’s nice to look back at photos and learn from my mistakes.
Anyway, here you go:
Look for The Jasmine Series Part II Series tomorrow, Tuesday 3/1/16.


![Alaska Day 5: Exit[ing] Glacier.](https://matthewlauphotography.com/wp-content/uploads/2016/06/featureimage.jpg?w=825&h=510&crop=1)